Table of Contents
Enter and Test Survey Entry LinkManage BillingFilter AudienceSave Draft SurveySoft LaunchLaunch SurveyAfter entering your project specs and defining your audience, you can click on the "Finalize and Launch" button to enter the Final Setup page.
Enter and Test Survey Entry Link
How to Enter Your Survey Entry Link
After you've entered in your survey information and defined your audience, click on the "Finalize & Launch>" button at the bottom of the page.

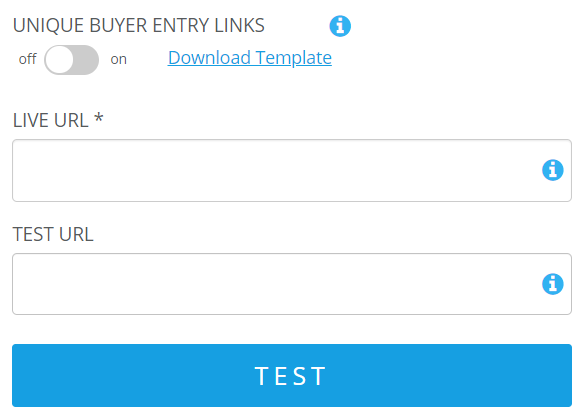
Live Link
Enter your survey entry link in the “Live URL” field.
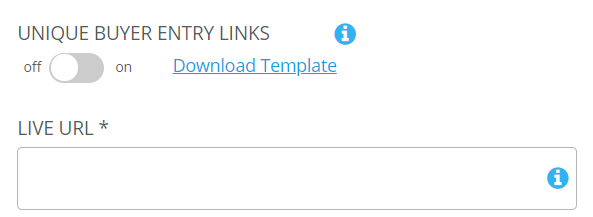
We will take your entry URL, and append “&transaction_id=[transaction_id]”.
For example http://yoursurvey.com/survey1 will become
http://yoursurvey.com/survey1?transaction_id=123456 .
If you need to receive transaction_id in a different form, review the Manage Buyer Settings instructions.
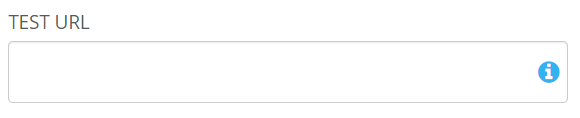
Test Link
The Test URL is used to create the “Test Link” that is available to both you & the suppliers that you have chosen. If you have a variation of your live URL that is used for testing, enter it in the "Test URL" field.
Redirect Links
Before testing and launching your survey, please be sure our redirect links are implemented.
After the respondent is finished taking the survey, you must redirect them back to us, including the [transaction_id] & appropriate redirect status [st] code.
Redirect Codes are as follows:
| Status | Status Code |
|---|---|
| Complete | 21 |
| Termination | 18 |
| Over Quota | 17 |
| Quality | 20 |
| Dedupe | 30 |
Returned URLs should follow:
| Status | Redirect |
|---|---|
| Completes | https://spectrumsurveys.com/surveydone?st=21&transaction_id=[transaction_id] |
| Over Quota | https://spectrumsurveys.com/surveydone?st=17&transaction_id=[transaction_id] |
| Termination | https://spectrumsurveys.com/surveydone?st=18&transaction_id=[transaction_id] |
| Dedupe | https://spectrumsurveys.com/surveydone?st=30&transaction_id=[transaction_id] |
| Quality | https://spectrumsurveys.com/surveydone?st=20&transaction_id=[transaction_id] |
If using the Qualtrics platform, Returned URLS should be implemented as follows:
| Status | Qualtrics Redirect |
|---|---|
| Completes | https://spectrumsurveys.com/surveydone?st=21&transaction_id=${e://Field/transaction_id} |
| Over Quota | https://spectrumsurveys.com/surveydone?st=17&transaction_id=${e://Field/transaction_id} |
| Termination | https://spectrumsurveys.com/surveydone?st=18&transaction_id=${e://Field/transaction_id} |
| Dedupe | https://spectrumsurveys.com/surveydone?st=30&transaction_id=${e://Field/transaction_id} |
| Quality | https://spectrumsurveys.com/surveydone?st=20&transaction_id=${e://Field/transaction_id} |
Testing Your Survey
To test your survey, click on the blue "Test" button.
Enter your pre-screening criteria.
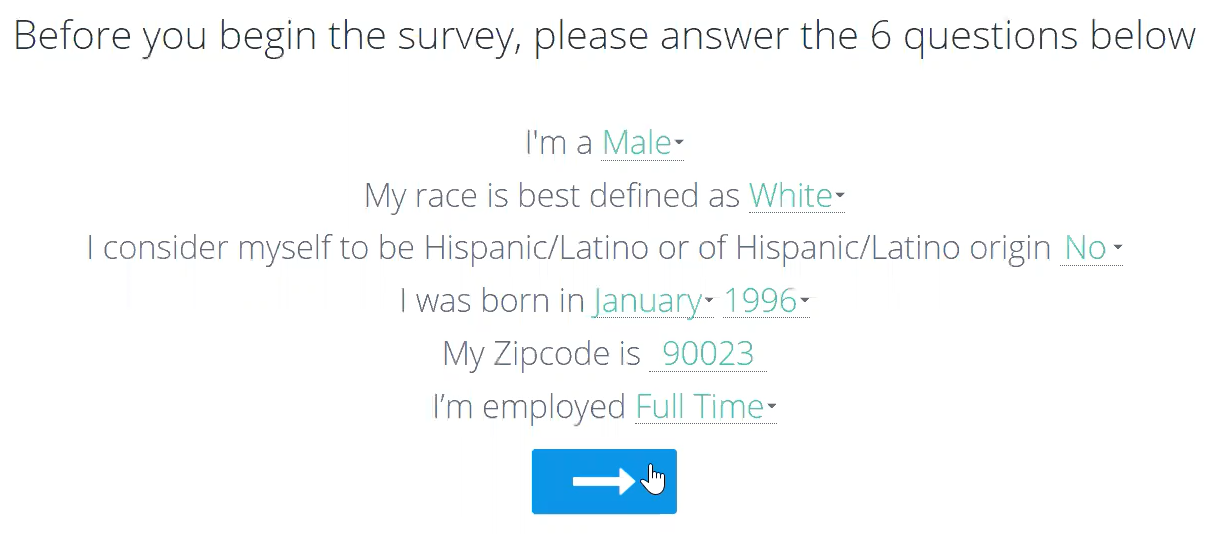
Once you enter your survey, make sure you complete and screen out of your survey.
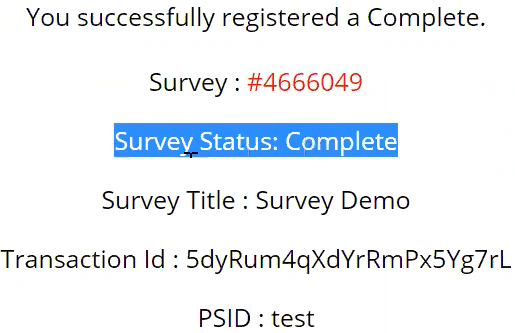
If redirected correctly, you'll land on our "Successfully registered a..." page will see the test respondent's survey status as well as the test transaction_id we passed through.
If redirected incorrectly, you'll land on our "Uhh-Ohh" page.

Watch Video
DeleteManage Billing
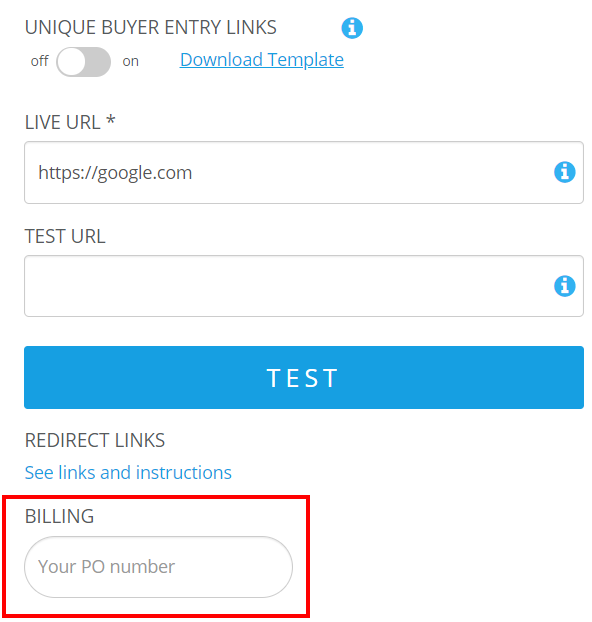
To enter a project's PO number for invoicing, add it under the "Billing" field box.
Watch Video
DeleteFilter Audience
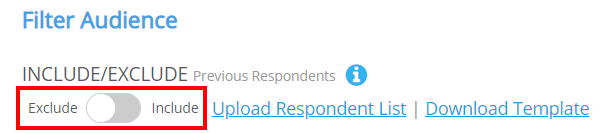
Include/Exclude Previous Respondents
If you would like to include or exclude specific respondents from your survey, set the toggle switch to either "Include" or "Exclude" those respondents.
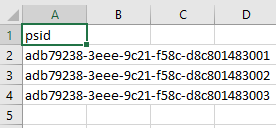
Download a template and fill in the list of PSIDs you would like to either include or exclude from your survey.
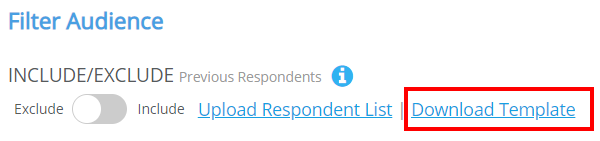
Once you've saved the downloaded template, select "Upload Respondent List".
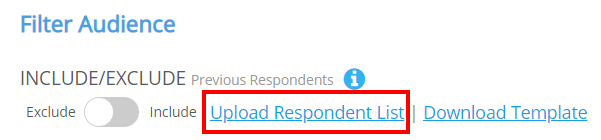
Once uploaded, select 'View Respondent List" to review the IDs which will either be included or excluded from the survey.


Watch Video
DeleteSurvey Grouping
To exclude respondents that have participated in previous surveys, enter the previous survey IDs in the Survey Grouping field box, separated by a comma.

Watch Video
DeleteSave Draft Survey
You can save your survey setup and this will be saved in your Drafts dashboard.
To save your survey, scroll to the bottom of the page and click on the "Save..." button and choose the type of Draft. 
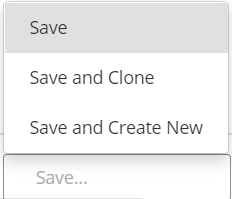
| Option | Result |
|---|---|
| Save | Saves your current survey to your Drafts |
| Save and Clone | Saves and opens a new survey with all information carrying over |
| Save and Create New | Saves and opens a new blank survey to start from scratch |
Watch Video
DeleteSoft Launch
To add a soft launch to your survey, toggle to switch to "on".
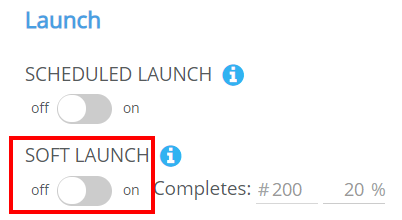
Enter either the number of soft launch completes or add a percentage of total sample.

Watch Video
Delete
Watch Video
DeleteLaunch Survey
When ready to field your survey, click on the "Launch Your Survey" button.

A new pop-up will appear asking you to review your targeting audience, pricing, and supplier allocation. It will also ask to confirm you have tested your survey. This is very important to make sure redirect links are implemented correctly. Once confirmed, you can click on the "Launch Your Survey" button.
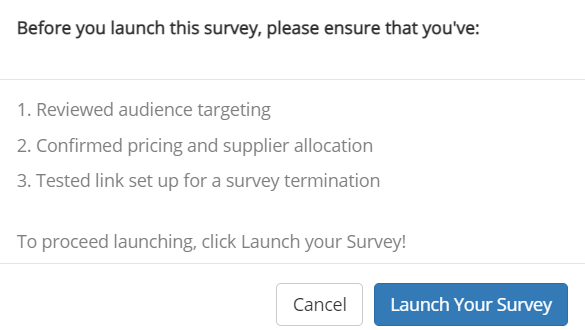
After clicking the "Launch Your Survey" button, you'll find your survey located under the "Live" tabs in your dashboard.
